
Embedded linux with T113-S3 | Part 1 - Building a Development Environment using Tina-Linux
Setup the Environment for Allwinner T113‑S3

Welcome to Ohmbed Kernel
I just received the T113-S3 board from Allwinner and am very eager to learn about it.
But like other processors from China, the issue of documentation and development environment always gives me a headache. It actually took me over a week to get the first logs printed from the serial port on the T113s3.
So, I wanted to make this post to guide people who are starting with T113s3 like me, save some time as well as share interesting things about this processor.
Now you're already. Let's get started
1. Overview
The Allwinner T113-s3 (sun8i) SoC features a Dual-Core Cortex-A7 ARM CPU and 128MB of DDR3 memory. It supports industrial temperature ranges and is targeted at the automotive sector.
The D1s is a pin-compatible variant with a single RISC-V core, all peripherals being identical except the CAN bus controller, exclusive to this chip.
Mainline Linux supports the SoC since at least v6.4. Most of the peripherals were already supported earlier, by the virtue of being compatible with the D1.
Mainline U-Boot (since v2024.01), as well as AWBoot and XBoot are supported bootloaders.
Allwinner maintains a 5.4/5.10 branch for it, with their Tina-Linux distribution.
You can refer to the link below for more information: T113-s3

2. Hardware
I am using hardware from LC maker, it is called LCPI-T113. Basically, it is a T113-s3 microprocessor with micro card slot, usb OTG + usb Host, a wifi module, camera header, LCD header, I2C header for touch IC,...


You can refer to the link below for more information: LCPI-T113
3. Setup SDK
LCPI-T113 uses Tina Linux - It is an OpenWrt based distribution
The publisher also provides us with a pre-configured virtual machine file (Refer this link) that can run on vmware, but for me, using the machine can be quite slow because your computer will have to share resources with the machine - for only one purpose, which is to build Tina-linux. Hmmm, seems quite waste of resources
But Tina-linux is built on quite old ubuntu versions (around 16.04), so building on newer ubuntu versions like 22.04 can cause some errors - One week of mine :)
So I think the most efficient solution is to use docker - Set up an Ubuntu 16.04 environment, install the necessary libraries without affecting your other projects.
3.1 Setup Docker
First, create a new Dockerfile file (Without extension) with below content:
FROM ubuntu:16.04

# preparatory steps
RUN apt-get update
RUN apt-get install sudo


# install tools
RUN apt-get install -y \
    x11-apps \
    xauth

RUN sudo DEBIAN_FRONTEND=noninteractive  apt-get install build-essential subversion git-core libncurses5-dev zlib1g-dev gawk flex quilt libssl-dev xsltproc libxml-parser-perl mercurial bzr ecj cvs unzip lib32z1 lib32z1-dev lib32stdc++6 libstdc++6 libmpc-dev libgmp-dev -y
RUN sudo apt install -y wget nano rsync xxd busybox bc


RUN adduser --disabled-password --gecos "" your_name
RUN usermod -g sudo your_name
RUN passwd -d your_name
USER your_name
Run this comment to create the image (tina-linux-16-04):
sudo docker build -t tina-linux-16-04 .Check the available images:
$ sudo docker images
REPOSITORY         TAG       IMAGE ID       CREATED        SIZE
tina-linux-16-04   latest    b140b4b2154b   5 days ago     706MB
hello-world        latest    74cc54e27dc4   5 months ago   10.1kB
Now you can create new container and use it to build a development environment
Run this command to create new container with the name: tina-linux
$ sudo docker run -it --name tina-linux tina-linux-16-04So now you are in the container. Next time you can use the command below to activate the container:
$ sudo docker start -ai tina-linux3.2 Install necessary libraries
Run below command to install the library:
$ sudo apt-get install build-essential subversion git libncurses5-dev zlib1g-dev gawk flex quilt libssl-dev xsltproc libxml-parser-perl mercurial bzr ecj cvs unzip lib32z1 lib32z1-dev lib32stdc++6 libstdc++6 libc6:i386 libstdc++6:i386 lib32ncurses5 lib32z1 -yRun the command below if you have problems installing 32-bit libraries
$ sudo dpkg --add-architecture i386
$ sudo apt update
3.3 Download SDK (Tina-Linux)
Here's the problem, I've searched many different sources but still can't find a reputable source to download the SDK. The git link of Tina-linux seems to have been moved to private (This link).
I ended up using a Vmware virtual machine and the virtual machine setup file provided by the manufacturer, copying the SDK out. Not a great solution but it was all I could think of to do.
Don't worry, you won't have to do that again. I've uploaded it to OneDrive and you can download it easily
Please download the SDK in the following link: Tina-Linux SDK
3.4 Build the SDK
After download the SDK (~11GB), Unzip it with the command below
$ tar -xzpvf tina-linux.tar.gzExecute the commands below to build the SDK
$ cd Tina-Linux
$ source build/envsetup.sh
Setup env done! Please run lunch next.
$ lunch
You're building on Linux
Lunch menu... pick a combo:
1. d1_mq_pro-tina
2. d1_nezha-tina
3. d1_nezha_min-tina
4. f133_evb1-tina
5. f133_mq_r-tina
6. t113_evb1-tina
7. t113_mq_r-tina
Which would you like? [Default t113_mq_r]: 7
============================================
TINA_BUILD_TOP=/workspace/Tina-Linux
TINA_TARGET_ARCH=arm
TARGET_PRODUCT=t113_mq_r
TARGET_PLATFORM=t113
TARGET_BOARD=t113-mq_r
TARGET_PLAN=mq_r
TARGET_BUILD_VARIANT=tina
TARGET_BUILD_TYPE=release
TARGET_KERNEL_VERSION=5.4
TARGET_UBOOT=u-boot-2018
TARGET_CHIP=sun8iw20p1
============================================
no buildserver to clean
[1] 137
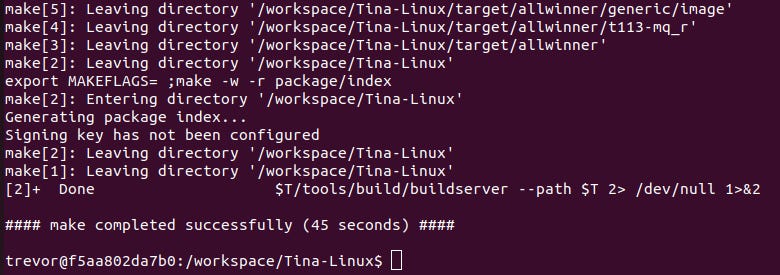
$ make -jX # X is the number of your computer threadThe compilation process will take about 15 minutes depending on your computer configuration. Once completed, you will see a message like this
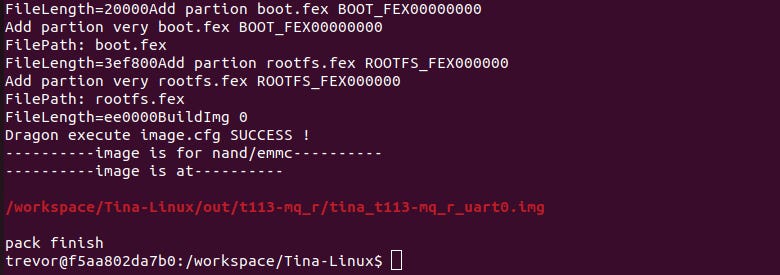
Execute the mboot and pack commands to create the .img file.
$ mboot
$ pack
You will see a message that the file tina_t113-mq_r_uart0.img has been created, congratulations
3.5 Update image file to T113-S3
You can use PhoenixCard (Windows) or OpenixCard (Ubuntu) to flash image files to your SD card.

If you use ubuntu, run the flash_t113.sh on /Tina-Linux/Tina-Linux/out/t113-mq_r/ to flash the image to your SD card
$ sudo ./flash_t113.sh tina_t113-mq_r_uart0.img /dev/sdcWarning: /dev/sdc is your SD card, you can check this by using the command lsblk
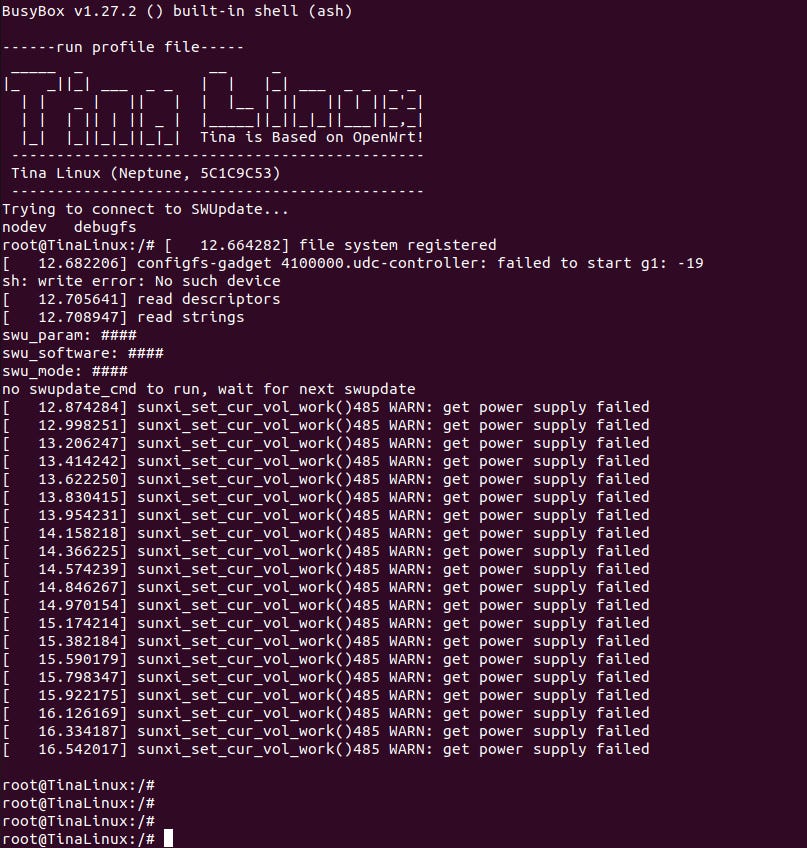
3.6 Insert the SD card, power the board and enjoy the results
Insert the SD card onto the T113-S3, connect the TX and RX pin (PE2/PE3) of T113-s3 to your computer, power the board. If there is no problem, the T113-s3 will print the startup log.
Thanks so much for sticking with me till the end of this tutorial! 😊
I hope it was helpful and made things a bit easier to understand.
If you enjoyed it, feel free to like, subscribe, and hit the notification bell so you won’t miss out on future content.
Got questions or thoughts? Drop a comment — I’d love to hear from you.
See you in the next one!
Thank you for the article.
An important note, that the build seems to expect some hardcoded file paths. When running in Docker, the Tina-Linux folder must be at /workspace/Tina-Linux
If you have extracted it on the host, the following Docker command will solve the issue:
docker run --rm -v /path/to/Tina-Linux:/workspace/Tina-Linux -it tina-linux-16-04:latest
Hi! I'm so glad I found this article! I had the same problems you describe, also used vmware. Also couldn't find a clean sdk. I found this chip very interesting, but there is almost no community support, and the manufacturer hid all the tools. Have you made any progress with this board? Do you have opkg working?
I'm waiting for the next article on T113-S3 from you)